- Web templates
- E-commerce Templates
- CMS & Blog Templates
- Facebook Templates
- Website Builders
How to enable Debug mode (display errors) in PrestaShop 1.7
July 3, 2018
Hello, our support team is ready to present you a new tutorial that shows how to enable Debug mode (display errors) in PrestaShop 1.7.
You might need to enable debug mode if you have:
Blank screen on the website;
Error 500;
Untypical shop behavior
Enabling Debug Mode Automatically
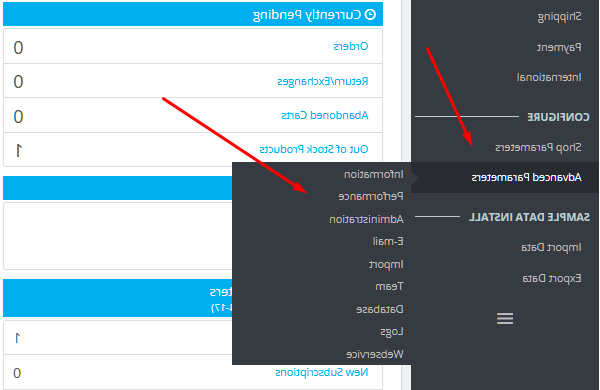
Navigate to Advanced Parameters > Performance section in your PrestaShop admin panel

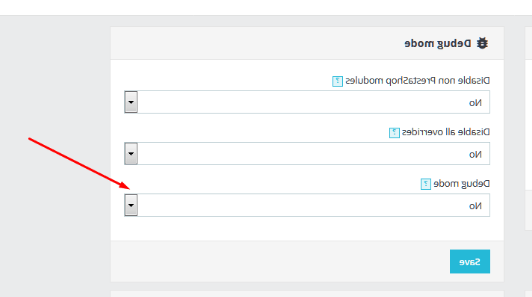
In Debug Mode section, set the Debug mode option to Yes and save the changes

Enabling Debug Mode Manually
Connect to server via FTP or via hosting cpanel. Open your PrestaShop installation directory, navigate to config director and opendefines.inc.phpfile.
Find the following code (line 29 approximately):
define('_PS_MODE_DEV_', false);Edit the code:
define('_PS_MODE_DEV_', true);Save the changes and refresh the site.
Now you need to navigate to a frontend/backend page you had issues on, press F5 to refresh the page and see the error(s) that occur.
Browse our new PrestaShop Themes and learn more about their usability.


